
Okay truth be told, I probably don’t need any more coasters in my life. I have a few that I handcrafted and plenty that have been gifted to me over the years which work perfectly well. But it’s often the case that when guests come over and I use coasters that all look the same, nobody remembers which drink is theirs and that makes for a lot of half-drunk beverages and extra washing up!
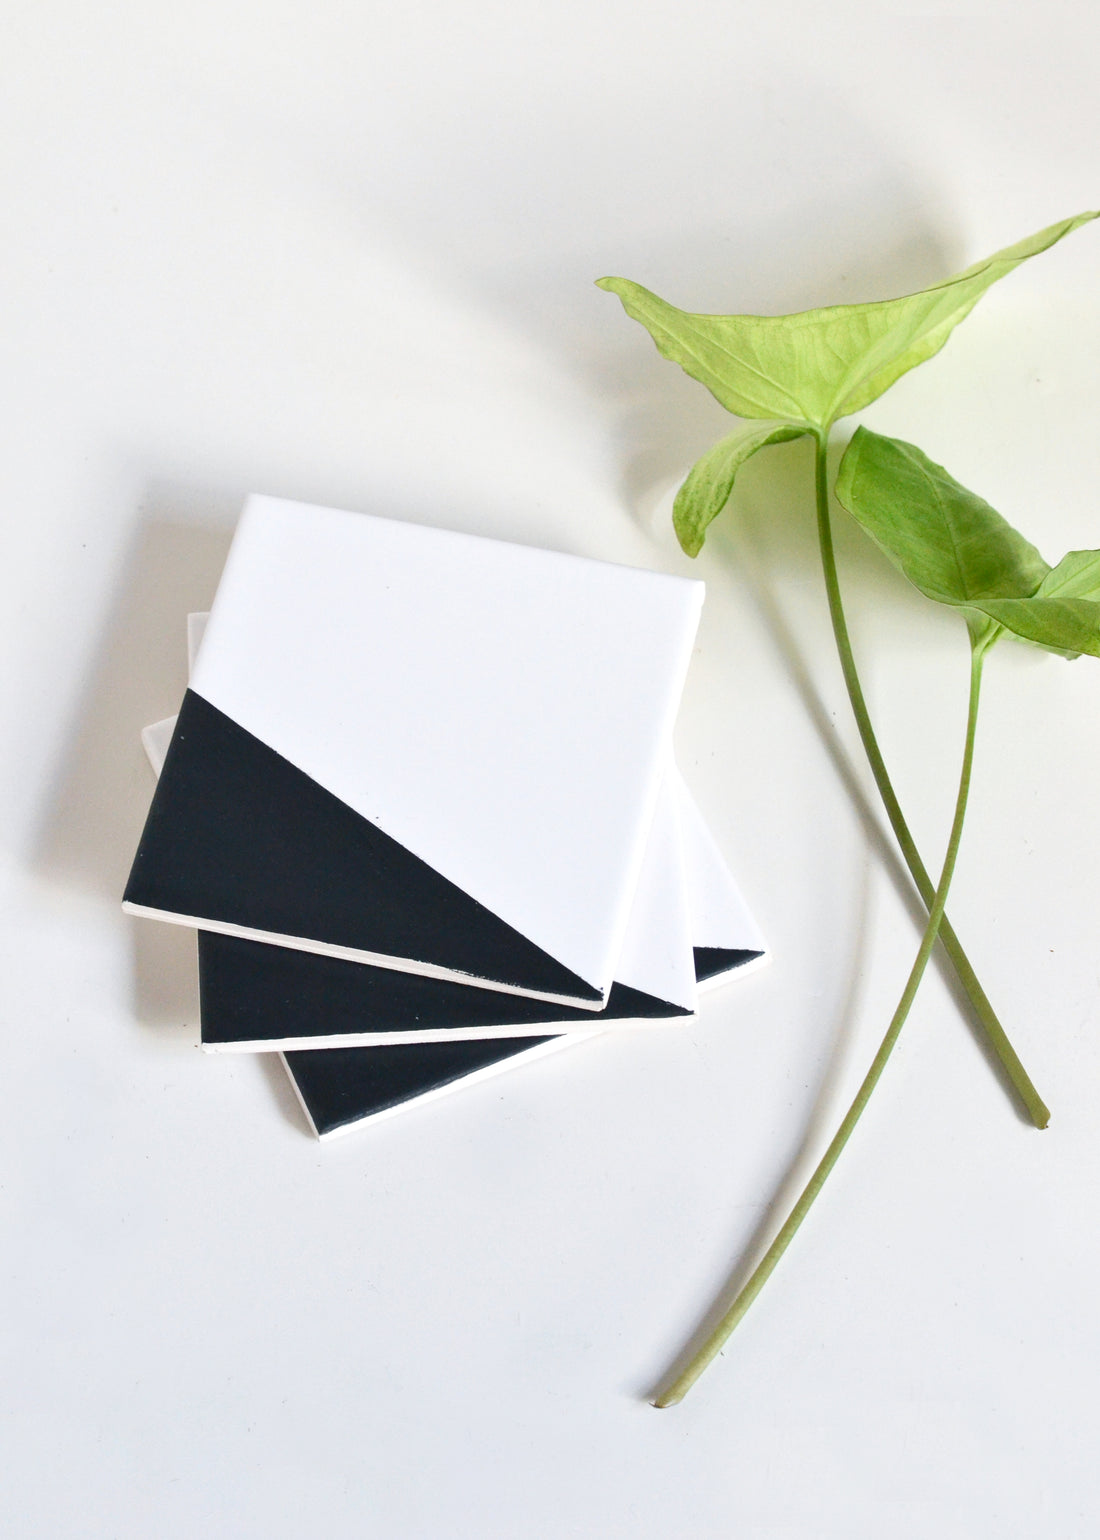
Enter my trusty blackboard paint. I love the chalkboard look but rather than go down the traditional all-black route for this project, I thought I’d give my coasters more of a dipped effect to let that gorgeous white tile shine through. If you’re also a fan of the colour blocked look, get out that chalkboard paint and follow along!
Materials
- White ceramic tiles
- Chalkboard glass paint
- Painter’s tape
- Chalk
- Adhesive felt circles (optional)

Step 1
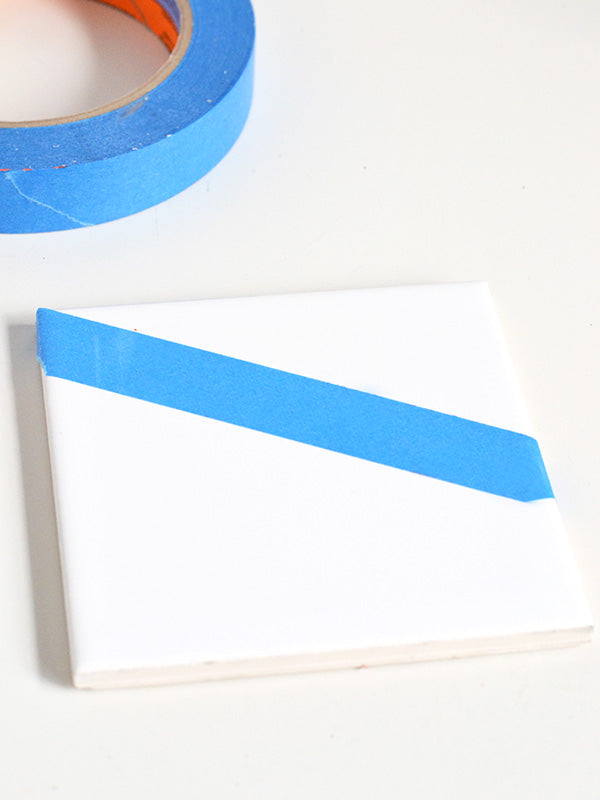
Give your tiles a good clean and then using your painter’s tape, mark out the section that you’d like to cover with paint.
Step 2
Start filling in the sectioned off area with chalkboard paint. Don’t worry too much if it looks streaky to begin with – after a few coats, the paint will look nice and streak-free.
Give your coasters two or three coats of paint and then set them aside to dry completely. Oh, and just in case you’re wondering, I used chalkboard glass paint rather than regular chalkboard paint so that the coasters could be wiped down after use without the paint coming off.

Step 3
Once your coasters are dry, peel off the painter’s tape and set the paint according to the manufacturer’s instructions. With the paint I used, this involved waiting 4 days (soooo long), and then curing the paint in an oven.
When the paint has set and the coasters are ready for use, you may want to add some felt dots on the underside to protect your table from scratches.


And there you go, with just a little bit of painting you’ve got yourself some spiffy chalkboard coasters to pull out when guests come knocking!


One more thing… did you see my post on Tuesday about my new liquid chalk markers? Those bad boys would be perfect to use with your coasters – the names won’t be smudged by hands or glasses, but will wipe off nice and clean at the end of the day with a bit of water, leaving your coasters ready for your next party. Excellent!
xx Steph