
Hmm. I seem to be a bit stuck on the whole cake topper thing… I can’t seem to go 3 weeks without a cake topper DIY. Which isn’t necessarily a bad thing (at least not for me anyway) – more cake toppers on the blog means more sweet treats in my house! I should spare a thought for my poor waistline but when it’s this cold, the afternoons just scream for cake and hot tea.
And this project was too good to resist – it’s REALLY easy plus the results are edible, so why not try it out? The worst thing that could happen is that you muck it up and end up with lots of leftover chocolate balls to eat. Um yeah. What a shame that would be…
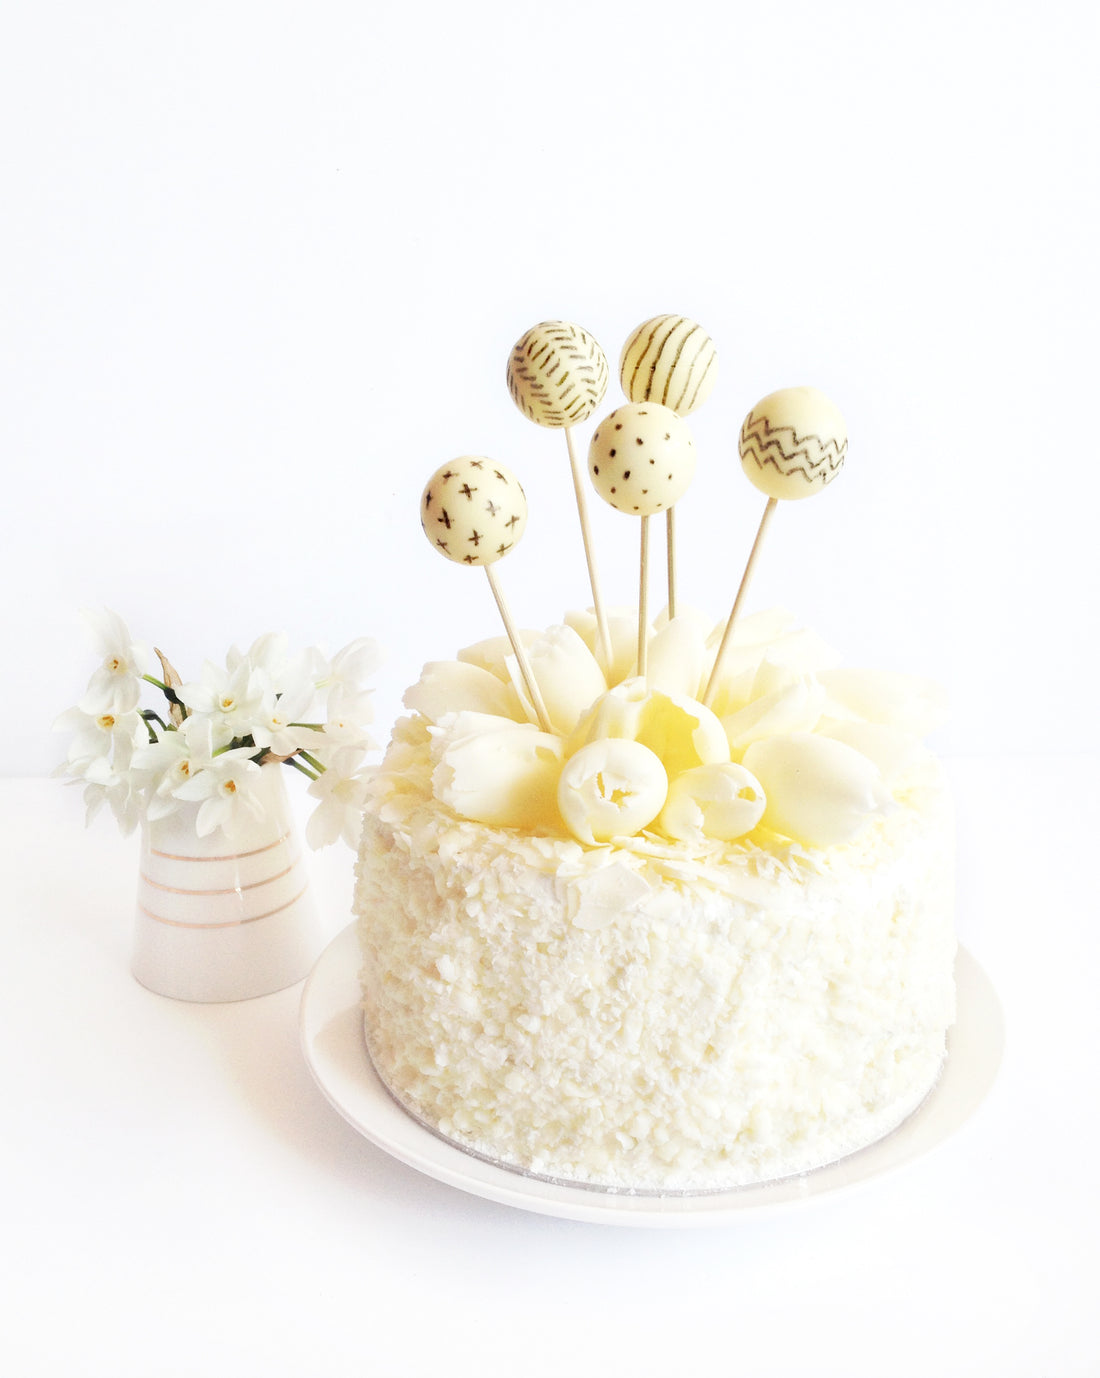
Materials
- White chocolate balls (I used Lindt)
- Food decorator pens
- Skewers
- A cake

Step 1
Make sure your chocolate balls are good and cold, then stick each one on the end of a skewer.

Step 2
Using the skewer as a handle, grab your decorator pen and draw on any kind of pattern you like! I’m still in a huge geometric phase, so my patterns were all lines and shapes. Don’t worry if it looks a little bit rustic – the hand drawn look is what you’re after!


Step 3
Stick the completed toppers into your cake.


I’m not sure that Step 3 even qualifies as a step? Really, you were done at Step 2 and you now have some pretty unique cake toppers to wow your guests at your next shindig. Oh, and don’t forget to let your party people know they’re edible. After all, that’s the best bit!
xx Steph