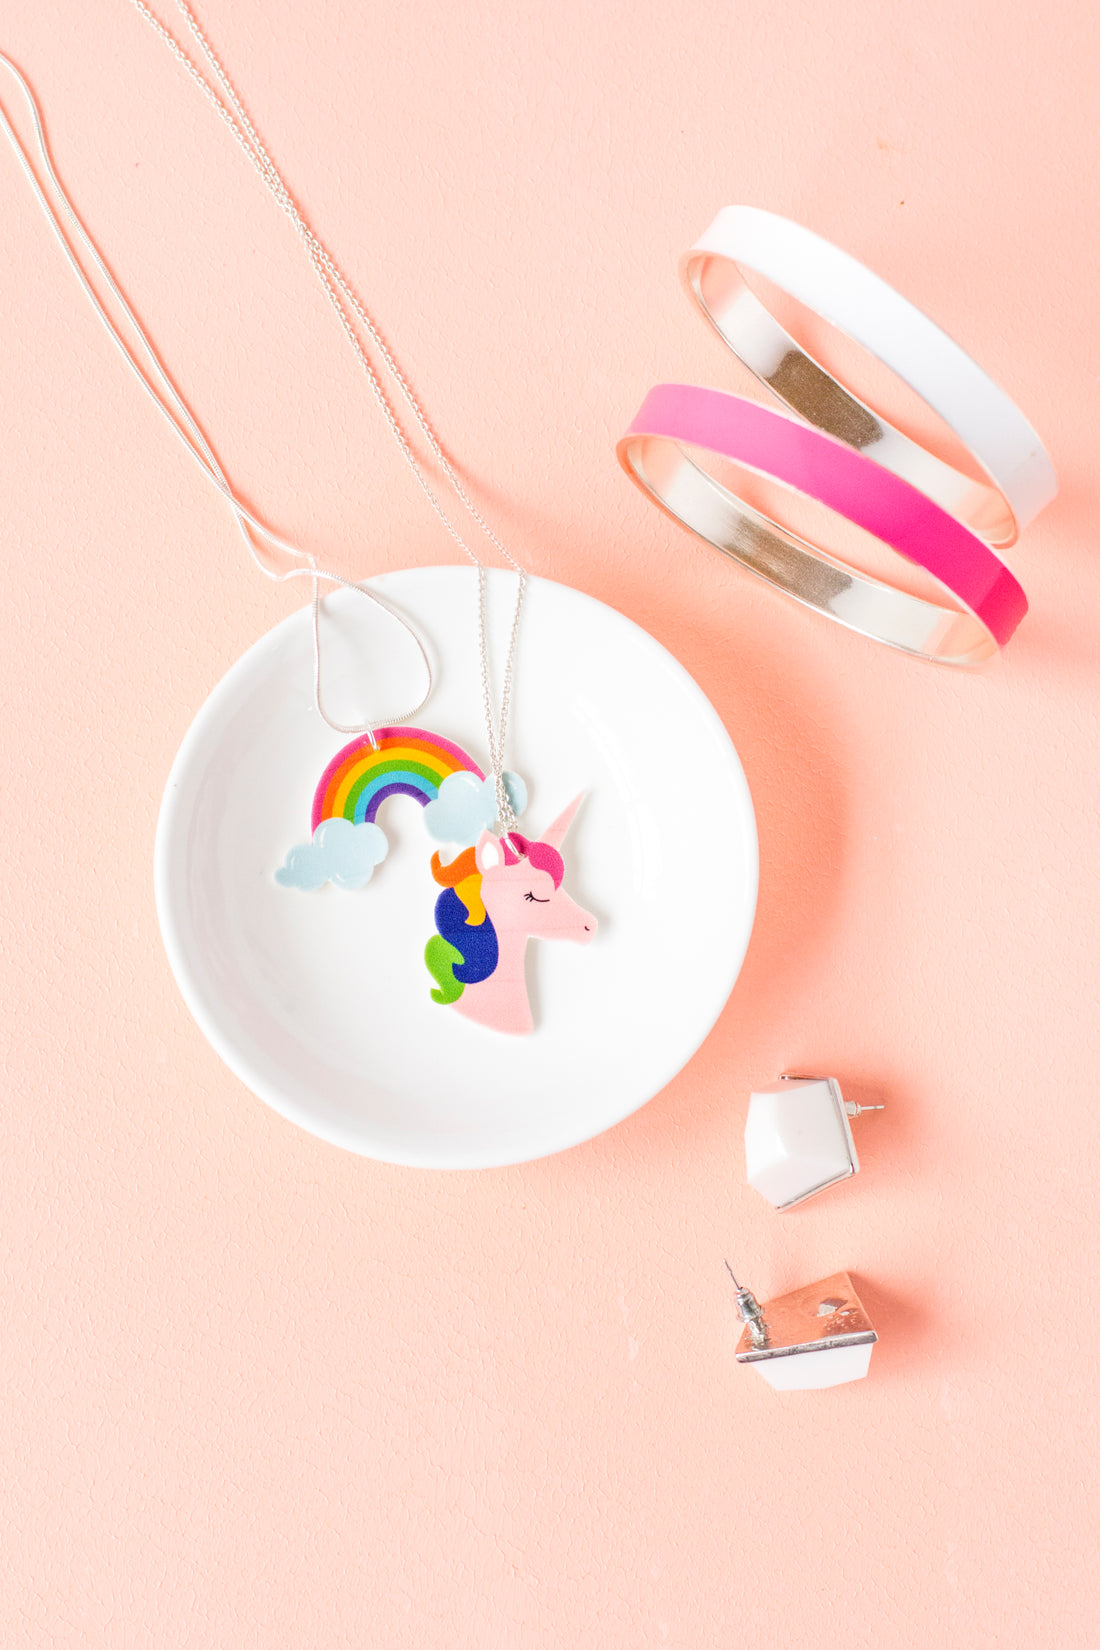

Guyyyyyyys. I cannot, cannot, cannot believe it’s taken me THIS long to try out shrink plastic. What have I been doing all my life?!
If my excitement seems excessive, just wait – you’ll soon see how much of a gamechanger this is. Armed with this new craft material (new only to me; the rest of the world has known about it for decades ha), I can now turn pretty much anything I design into necklaces. Or earrings. Or magnets. And you know what that means? So can you!

This also means that I’m going to constantly wear unicorns and rainbows around my neck because I can. So I might no longer have any friends who want to be seen in public with me. But that’s alright, shrink plastic will fill the void – after all, we have a lot of lost time to catch up on! 😉
Okay, enough of my crazy woman ramblings; get yourself some shrink plastic and let’s get these super fun necklaces into your life!

Materials
- Rainbow pendant printable (see the end of this post to download)
- Shrink plastic sheets
- Scissors
- Hole punch
- Jump rings
- Jewellery pliers
- Chain or cord

Step 1
Download the rainbow pendant printable (at the end of this post) and print it onto a shrink plastic sheet. Make sure you use the correct type of printer for your plastic; mine was made for an inkjet printer, but others might be different.
Side note: Don’t worry too much at this stage if your print looks a bit faint. The shrinking process will intensify the colours quite a lot, so your finished necklaces will end up nice and bright.
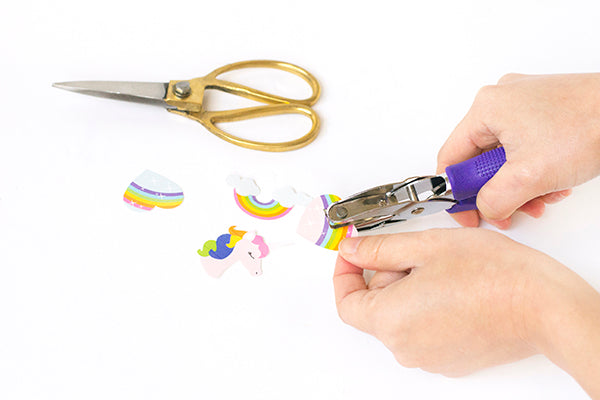
Once you’ve printed out the file, cut out each of the rainbow pendants with a pair of scissors.

Step 2
Punch a hole in each pendant with a hole punch. The hole might look a bit large at present, but rest assured it’ll shrink in size along with the rest of the pendant.
Step 3
Follow the manufacturer’s instructions to shrink your rainbow pendants. My shrink plastic needed to be laid on top of baking paper and placed in a 150° celcius oven, but the directions for yours might be different so it pays to check before baking.

Step 4
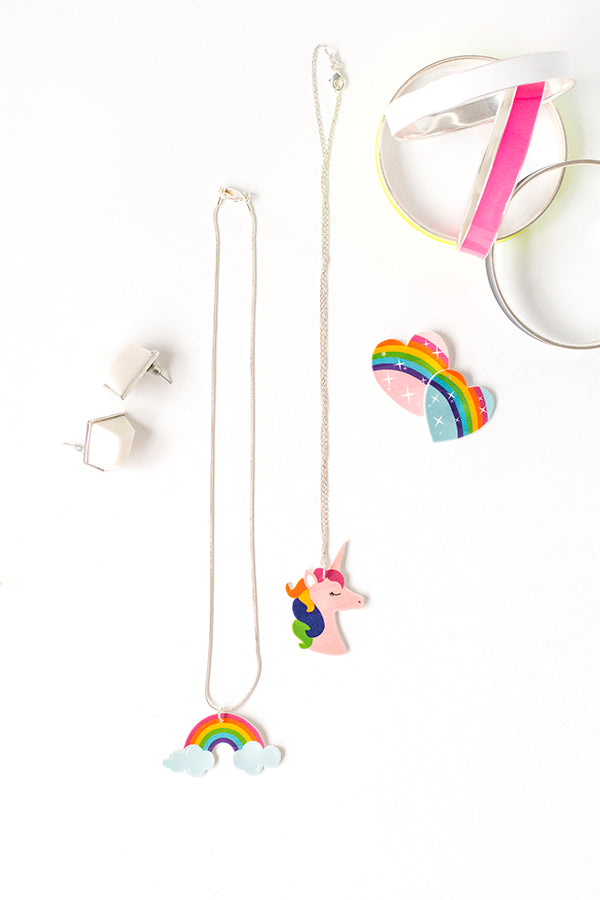
Once your pendants have shrunk and cooled, use a pair of jewellery pliers to insert a jump ring through the hole you punched in Step 2.

Step 5
Feed a chain through your jump ring and your necklace is finished!

If you have keen eyes you might have noticed that my plastic didn’t shrink much between Steps 1 and 5. And that would be because I stuffed up! I initially made my design wayyy too small, resulting in pendants that were no bigger than my fingernail (oops!) so I went back and enlarged the design before taking the final shots of the necklaces.
This won’t affect your jewellery in the slightest though – the design is now the right size to make pendants that are a respectable 2-3cm tall. 😉

I still can’t quite believe how versatile shrink plastic is (if you think my obsession with this stuff is bad, just wait til I get my hands on my first 3D printer). I’ve got plans to do many DIYs with this new material in the future (all with free printables of course), so make sure you stay tuned for lots more shrinking, plastic fun!

Rainbow necklace pendant printable
xx Steph