
Have you ever completed a paper project only to find that you’ve got lots of pretty leftover scraps that you just can’t bear to throw out? That my friends, is the story of my life. So the other day, after yet another unsuccessful attempt at cleaning out my craft drawers, I decided to approach things from a different angle and make something where I could use the scraps instead of throwing them away!
I’ve been wanting to work on a nursery DIY for sometime now (haha no, I don’t have any big news to share with you – I just think baby projects are fun) so turning my paper scraps into wall art for a bubba’s room seemed like the perfect plan. If you’d like to make some art for your own little one, get out all those spare bits of paper and follow along!
Materials
- Patterned paper (you can use origami paper, scrapbook paper or any other coloured paper you have on hand)
- Two sheets of white card (size A4)
- A circle punch (mine measured around 5cm / 2 inches in diameter)
- Scissors
- Glue or double-sided tape

Step 1
Punch lots of circles out of your scrap paper (enough to cover one of your A4 sheets of white card).

Step 2
Lay one sheet of white card on the table, and then start covering it in your punched circles. Add a bit of glue (or some double-sided tape) to the back of each circle before placing it down so it sticks to the white card.
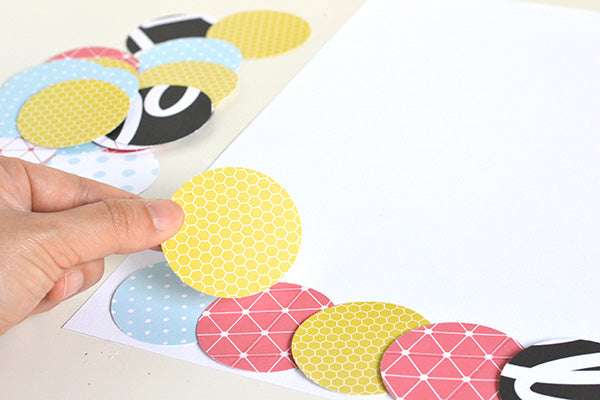
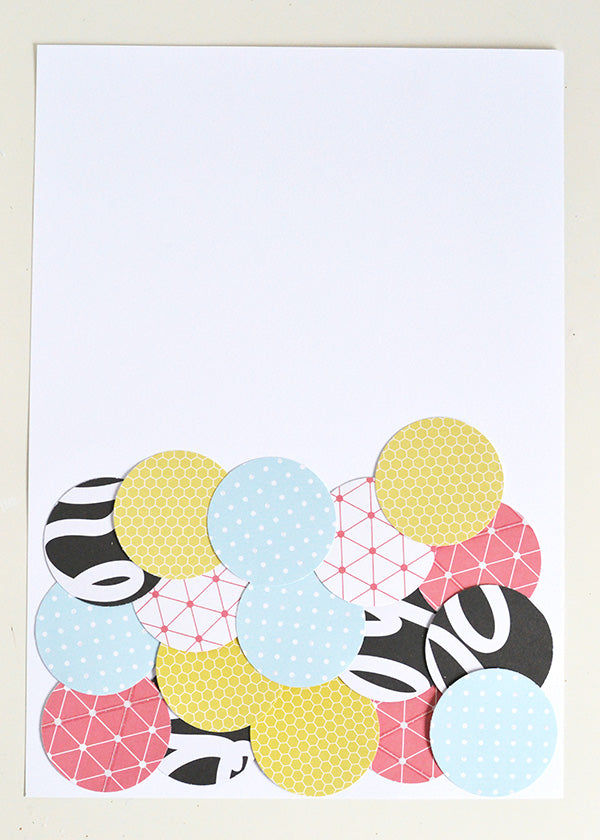
Eventually, all of your white card should be covered in circles. As you can see, I wasn’t very precise about where my circles were placed and I didn’t put circles right to the edge of the card. At this stage, it’s more important just to ensure there are no gaps between the circles in the middle.

Step 3
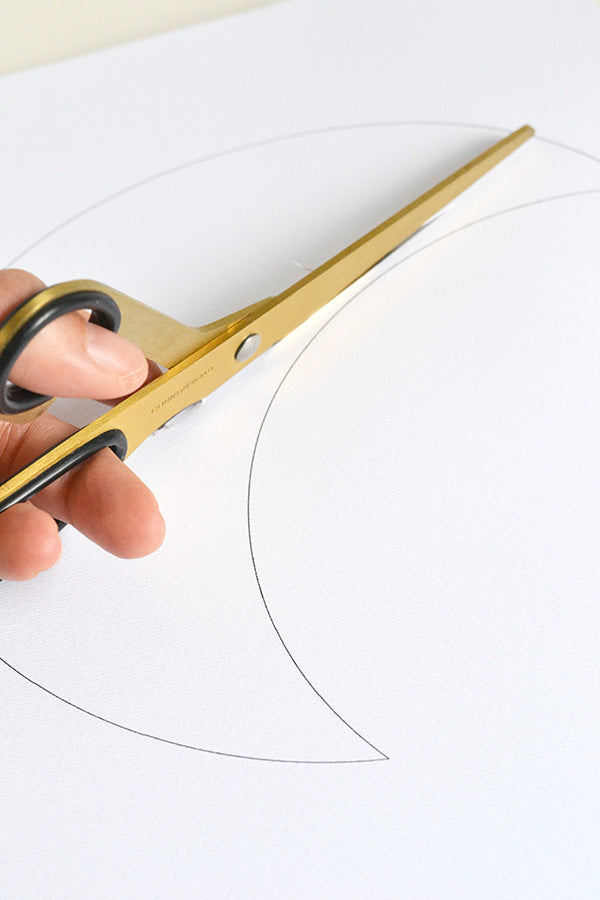
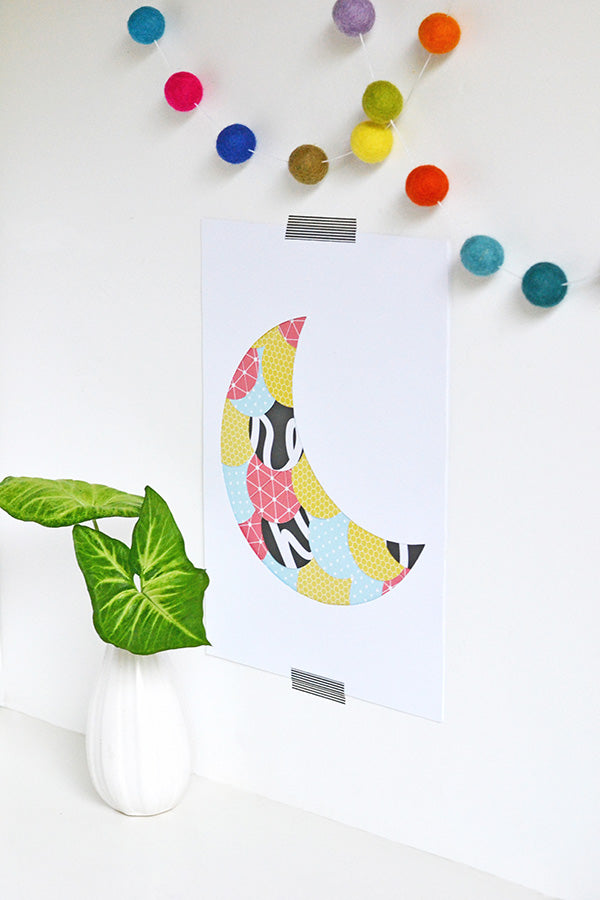
Head to the end of this post and download the crescent moon template. Print it out onto your second sheet of white card, then cut out the moon in the middle using a pair of scissors.

Step 4
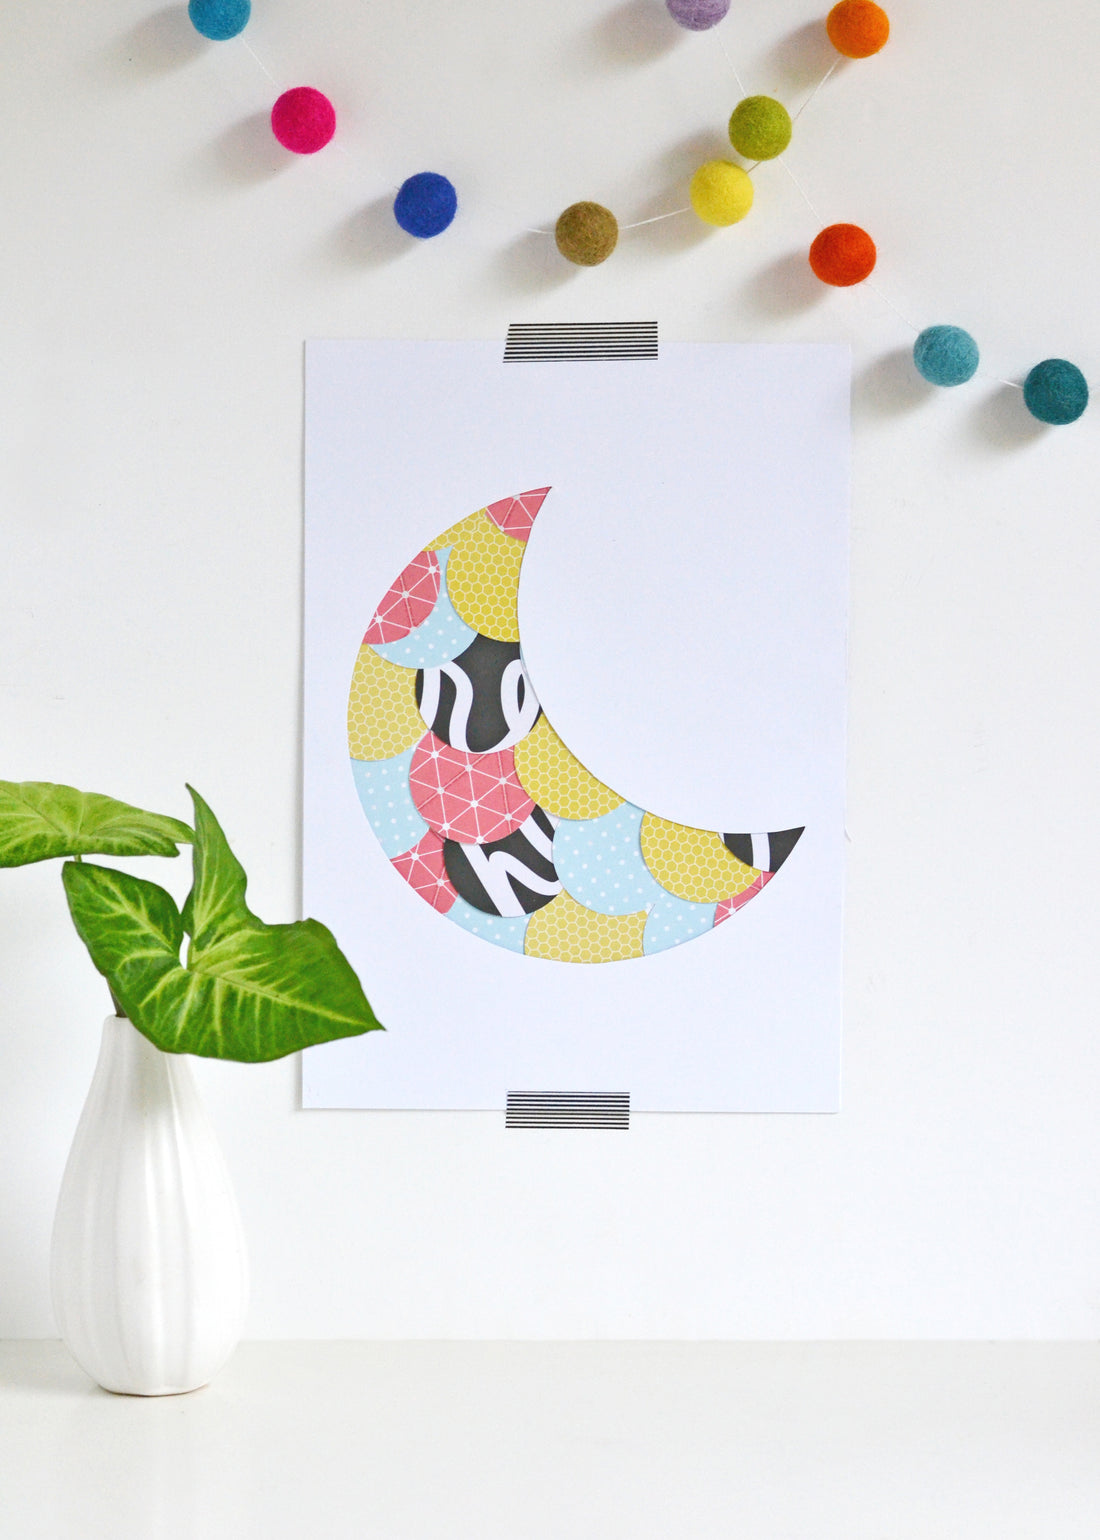
Place some glue or double-sided tape on the back of the crescent moon card and then stick it down on top of your circles. You’ll end up seeing the coloured circles through the cut-out moon.


Then all that’s left to do is to hang your new wall art on your nursery wall for an instant pop of colour!


A couple of things to note with this project – firstly, it pays to be a little selective with the colours and patterns of the scraps you use. Try to choose designs that complement each other nicely and stick to colours that you already have in your nursery so that your wall art will really fit in with your existing decor.
Secondly, this project is nice and easy, so why not get the kids involved? They could help you choose which scraps you use and they could also punch the circles… I’m sure they’ll be proud as punch to see the art they made up on the nursery wall 🙂

xx Steph