

Happy first day of winter! I can’t believe we’re half way through the year already. The weather’s kinda strange these days – it’s a bit warmer than I thought it’d be at this time of year, but it’s still cold enough to make snuggling under blankets and lighting some candles very attractive!
On that note, here’s a little winter DIY I dreamed up, inspired by all the wonderful marbling that’s been doing the rounds lately. And sure, they may not give off a lot of heat, but on a cold night these tea lights will help to make you feel nice and cosy. If you’d like to give them a go, just follow along with the instructions below…
Materials
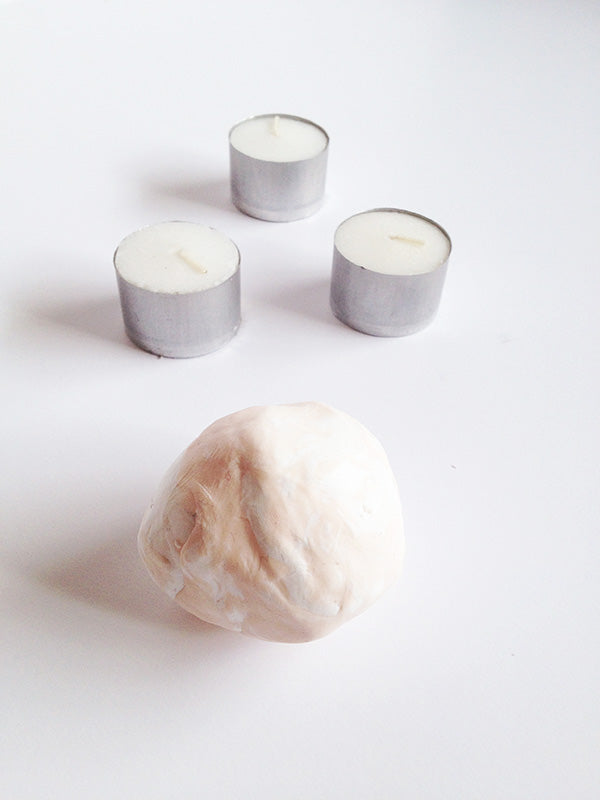
- Polymer clay in white and pink
- Square cookie cutter
- Tea light candles

Step 1
Knead the white clay to soften it and add in bits of the pink as you go. Twist the clay while you’re kneading it to create a nice marbled effect.
Step 2
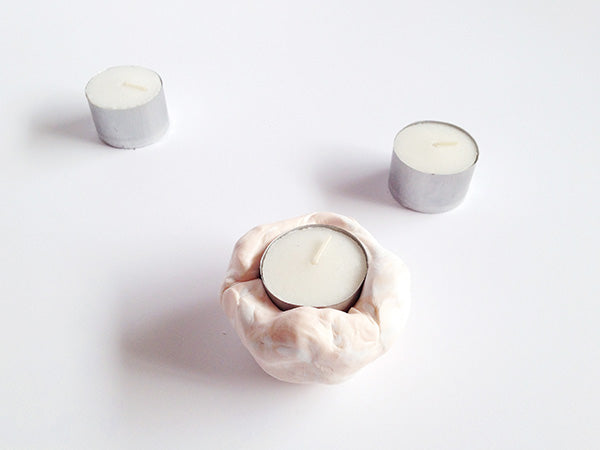
Once the clay is soft enough to mould, shape it around the tea light candles.
Step 3
Flip the clay over (with the tea light still inside) and flatten the bottom and sides to create a bit of a square shape. Doing this upside down helps to nicely flatten the top as you press down on the clay.


Step 4
Grab your cookie cutter and use it to make the square shape more defined.

Step 5
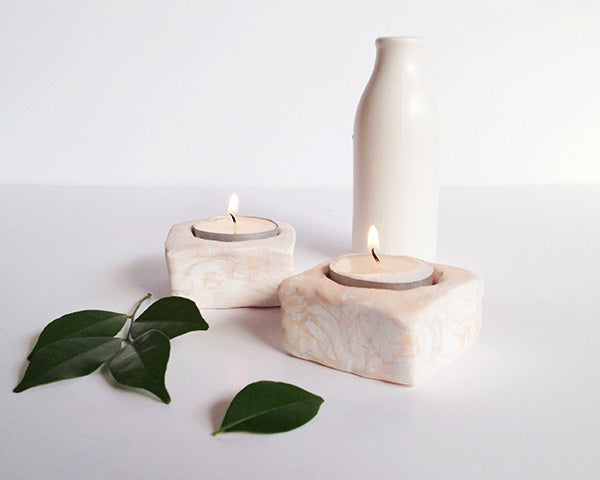
Once you’ve removed the clay from the cookie cutter, wiggle the tealight out of the clay. Then use a knife (or your fingertips) and some water to smooth the edges and remove any cracks. If your clay requires it, fire it in the oven according to manufacturer’s instructions so it hardens.
And that’s it – you’re done!

So, lessons I learned while doing this project:
- Even though I used ‘soft’ clay, it still took a good deal of kneading to get it malleable enough to use. It tried definitely tried my patience and muscles (or lack thereof!) 🙂
- Next time, I might use a darker colour to marble with. I love the subtle pink, but in areas where there isn’t much colour, it sort of looks like the white clay is just dirty.
- Again with the patience… it took AGES to get the clay out of the cookie cutter. You just have to stick with it and wriggle it out slowly. Or perhaps it’ll come out easier if you wet the cookie cutter first? Try it out and let me know!
xx Steph
1 comment
I recommend cornstarch to get the clay out of the cutter. You can choose to put it on the cutter or directly on the clay. Water will do no good i think.