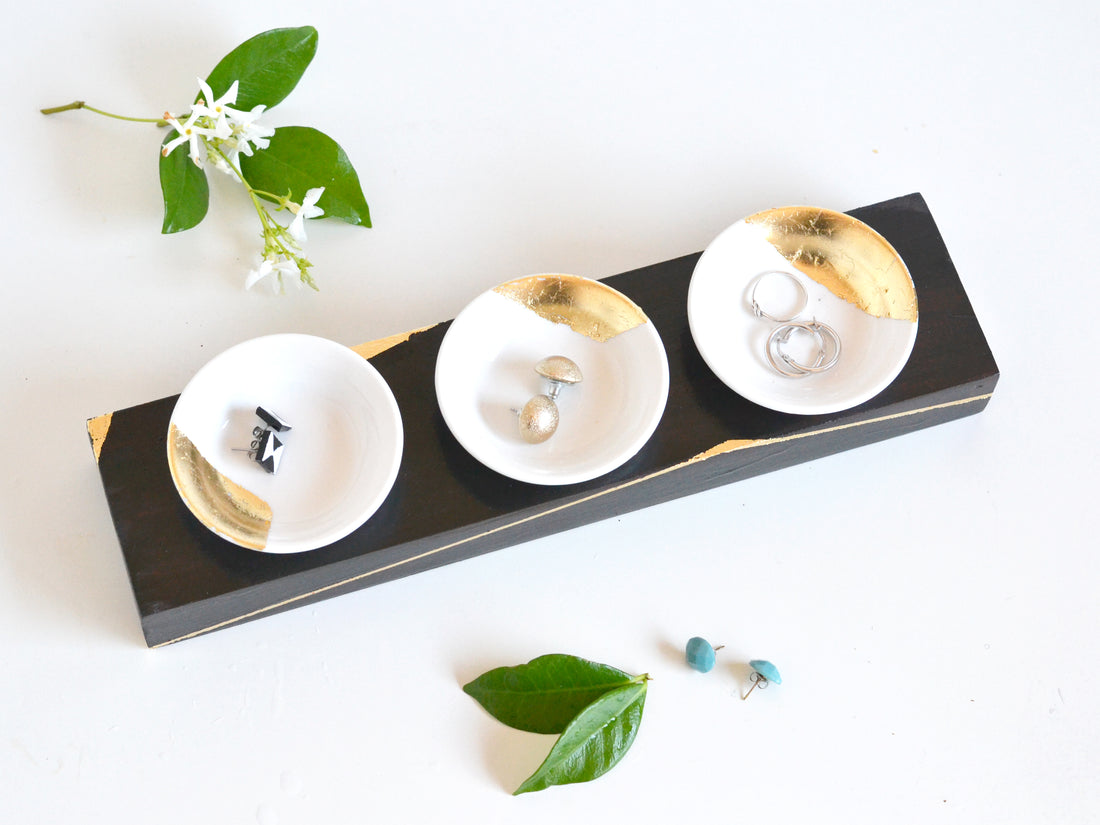

Whew, I think this is the biggest DIY I’ve done yet. I really went to town with this one, even broke out the power tools!
I’m glad I made the effort though – I’ve been wanting something nice to store my jewellery in, and this project ended up fitting the bill just perfectly. It also gave me a chance to try out using gold leaf on dark wood which I’ve been meaning to do for ages.

As always, especially in a project like this where I used materials I’d never worked with before, there were mistakes made and lessons learnt along the way. But it was really, truly worth it – I love the end result and it cost a fraction of what I’d have paid for something like this in a store. Also it lets me organise my trinkets into different categories to make things easy to find – bonus!
Materials
- Wood plank (I used pine)
- Saw
- Spade drill bit (4cm/1.57 inches – you could use a larger one if your bowls are bigger)
- Power drill
- Walnut satin stain
- Little sauce bowls
- Gold leaf and adhesive pen
- Painter’s tape
- Paint brush
- Clear varnish

Step 1
Line up your bowls along the wood plank until they’re spaced as you’d like. Then make a mark where you’d like the plank to end using a pencil. Take it outside and saw it to size (if you’re lucky like me, you’ll have a handy husband to help you with this part!)
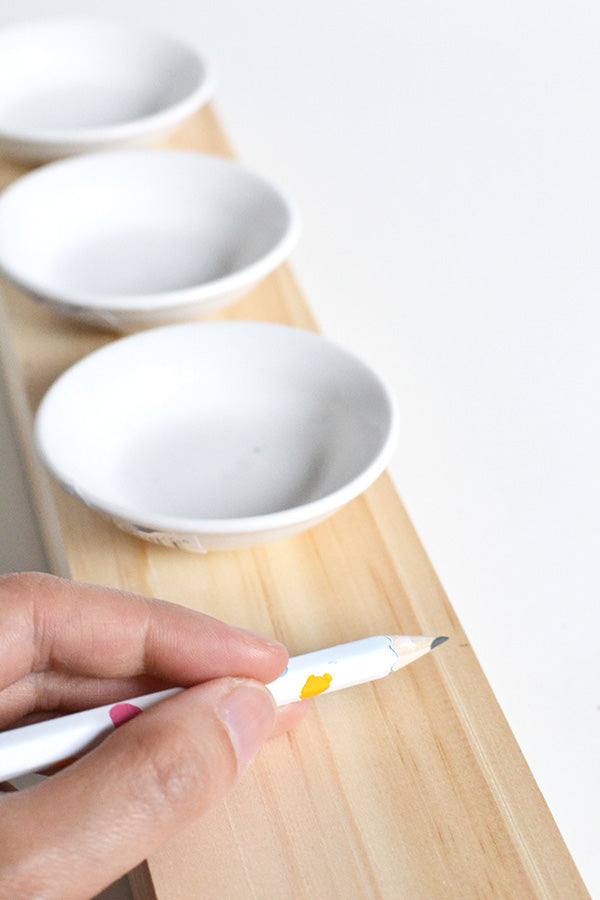
Step 2
Once again, line up your bowls along your (now cut-to-size) plank and use a pencil to mark little dots where the centre of each bowl should go.
You’ll be using these markings to drill holes for the bowls to sit in. That way, they’ll be sunk into the wood just a little bit, rather than just floating around on top where they could easily get knocked off.

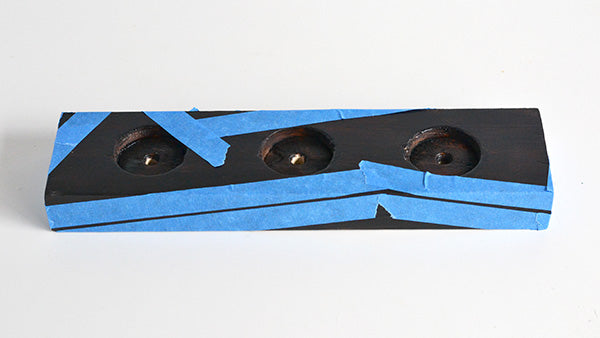
Step 3
Turn your plank on its side. Get your spade drill bit, line it up with the side of the plank and mark out with painter’s tape how deep you’d like it to go into the wood when you’re making your holes.
I didn’t want my holes to go all the way through the wood, so marking it out like this helped make sure I didn’t go too deep when drilling.

Step 4
Take your plank outside, get that power drill out and drill your holes. Make sure you stop every now and then to check you haven’t drilled deeper than the line marked out by your painter’s tape.
So… drilling. I don’t have a picture of this part but I’ll be honest, the whole experience was a bit hit and miss. The drill bit kept catching, so the rims of the holes weren’t as smooth as I’d have liked them to be. I guess me and power tools aren’t a great mix. But not to worry, I found a way to cover up some of my mistakes – see below! 😉
Step 5
Once your holes are drilled, give your plank a good sanding to get rid of any rough edges. Make sure you wipe down your wood afterwards to remove all dust and dirt.

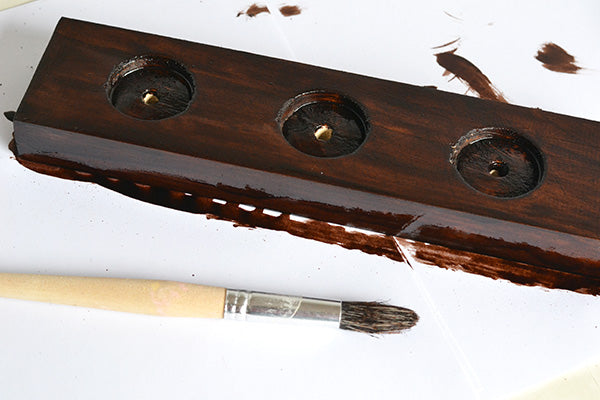
Step 6
Grab a paintbrush and get your stain on!
Ah, staining. I wouldn’t have thought I’d enjoy it this much, but I really did! This was the first time I’d used wood stain and there’s something SO SATISFYING about turning a piece of plain pine turn into something so decadent. Also, the colour and intensity of the stain really helped to hide the flaws from my drilling. Win!

Step 7
The only bad part about the wood stain is that it takes AGES to dry. Twelve hours after each coat. Ugh.
While you’re waiting for that to happen, move onto your bowls. Give them a good clean, then mark out with painter’s tape where you’d like your gold leaf to go. I kept the leafing on the bowls nice and chunky and a bit geometric.

Step 8
Once your tape’s in place, start adding your adhesive to the bowl. On the packet of my adhesive pen, it says the adhesive goes on blue and dries clear, but really it goes on white. Which is not so great if you’re working with white ceramic! If you’re not doing a shape that’s marked out with painter’s tape like mine, make sure you remember where you’ve made your markings, otherwise you won’t know where to place your gold leaf!

Step 9
Once your adhesive has been sitting on your bowl for around 5-10 minutes, you can add on your gold leaf. The adhesive should be tacky to the touch when you do this.
I found cutting up my gold leaf into smaller pieces made it much easier to work with – once it’s been cut to size, apply it paper-side up and press it into place.


Step 10
That wasn’t too bad right? I think this is by far the easiest experience I’ve had with gold leaf to date. And now that we’re all pros (ha ha!), you’ll be all set to add some gold leaf to your wood base.
Once your stain has dried, tape up your base with the pattern that you’d like your gold leaf to be applied in. I was inspired by this stunning dresser and decided I wanted to create thin lines along the wood.
Step 11
Follow the same process as for your bowls – first apply the pen adhesive, wait for it to become tacky, then add your gold leaf.


Step 12
Once your gold leaf has been applied and everything is looking good, give your wood base and bowls a spray with some varnish to protect the gold leaf. Then sit your bowls on top of your base and you’re done!


It occurred to me after I’d finished this project that the wood base would also make a nice tea light candle holder. Perhaps make the plank a bit longer so you could fit five across, then you’d just need to drill the holes a bit deeper (and neater than mine!) so your tea lights would fit in and be flush with the top.
I might try this next time using my leftover wood… after I’ve sufficiently recovered from today’s power drilling experience that is. 😀
xx Steph