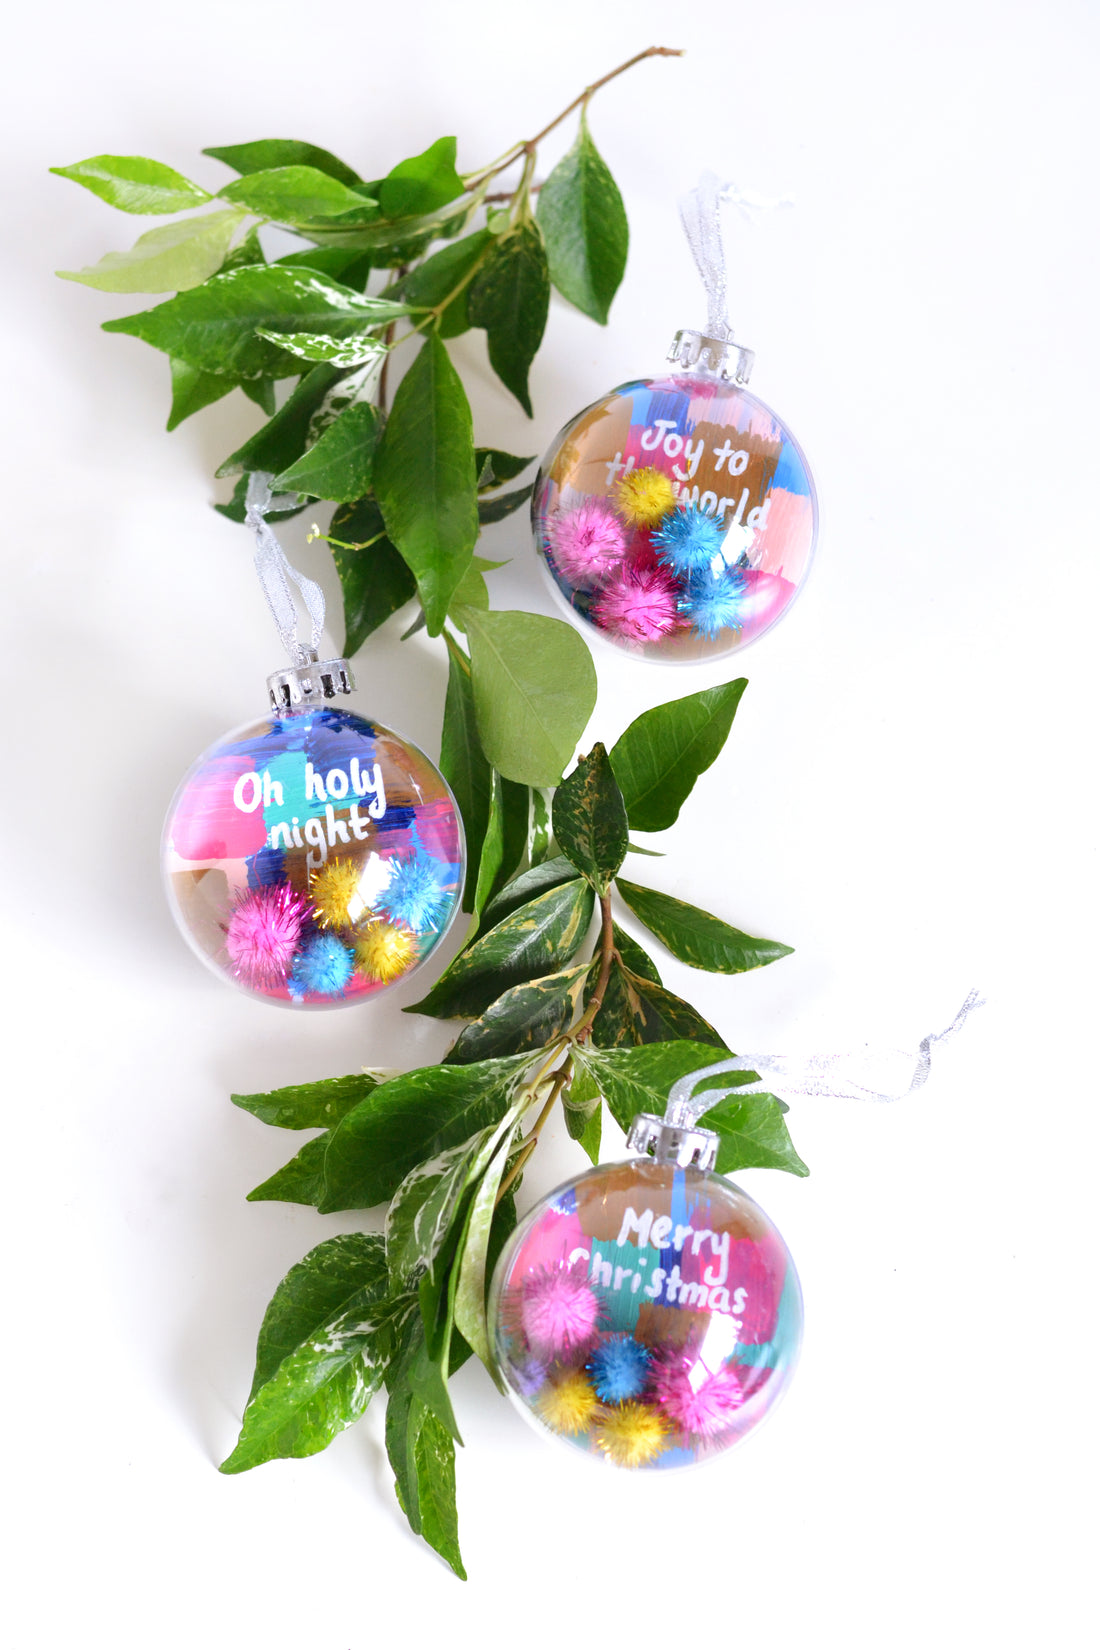

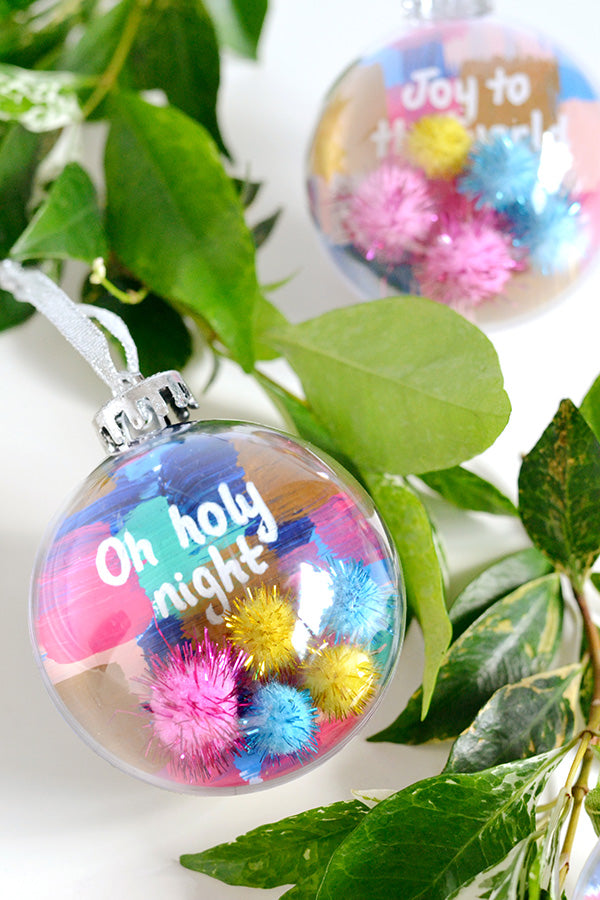
Christmas is my absolute favourite time of year, but while I love the season, I’m not a big fan of traditional festive colours. So I try to include my own favourite shades in my holiday decorating wherever possible, and these photo baubles from The Reject Shop make it really easy to do just that!
Best of all, these ornaments aren’t just good for hanging on your tree – they can do double duty as place cards or favours too. Follow along below to see how!

Materials
- Photo baubles (from The Reject Shop)
- Pom poms in assorted colours (from The Reject Shop)
- Flat paintbrush
- Acrylic paint (various colours)
- White card
- Pen or pencil
- Scissors
- White paint pen or white gel pen
Step 1
Gather all the colours of paint you’d like to include in your baubles and start painting brush strokes on your cardboard. I found it was easiest to apply each colour separately, painting lots of brush strokes in one colour before moving onto the next. The aim is to have the whole sheet of cardboard covered in paint.


Step 2
Wait for the paint to dry, then mark out circles on your painted card by tracing around one half of the photo bauble. Trace twice as many circles as there are baubles.

Step 3
Cut out each of the circles with a pair of scissors. Try to cut inside the line you traced so that the pen mark isn’t visible (and also to make your circles just a tad bit smaller so that they can later fit inside your baubles).

Step 4
With a white paint pen (or gel pen) write in your Christmas greeting. Don’t worry if your handwriting is bad (mine is atrocious!); if you’re concerned about how your writing looks, practice first in pencil before going over the final version with the paint pen.

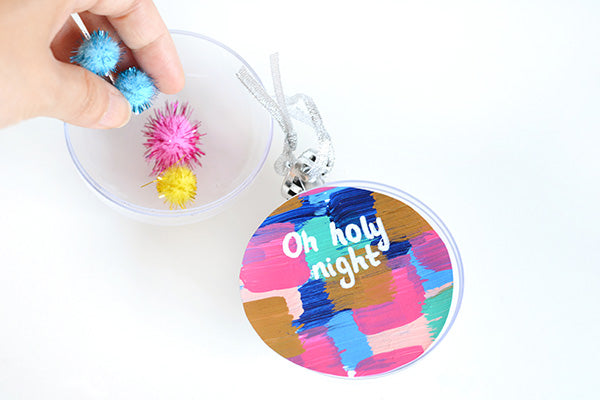
Step 5
Fill once side of your bauble with pom poms. Place two of the painted circles back-to-back (i.e. painted sides facing outward) and insert them into your photo bauble. Then add a few more pom poms to the other side before closing the bauble.


That’s pretty much it – all that’s left to do is hang them up and enjoy!

But wait, there’s more!
These baubles don’t just make great holiday decorations, they can also double as place cards for your Christmas party! Just write in each guest’s name on one side and a Christmas greeting on the other, and leave them at each place setting. Your guests can even take them home after the party as favours!


xx Steph
A little note: This post was created in partnership with The Reject Shop. All opinions and the project are my own. Thanks for supporting the organisations that support Make and Tell.