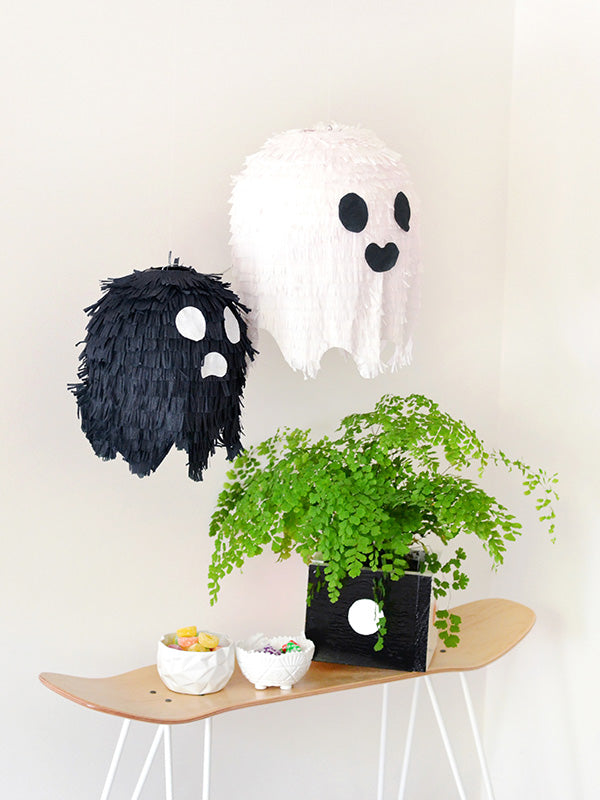

I’m going to be a bit controversial here and say that I’ve never in my life made a piñata before. I know right… for a chronic DIYer, that’s pretty much unheard of! I’ve just never had a good reason to in the past, but now that Halloween is almost here and my nieces are a bit older, I thought it was the perfect time to put my fringe-trimming skills to use and make one for them to crack open on the big day.
And guys, it’s so much fun! Not to mention easy. Especially since I used some paper lanterns I found at The Reject Shop which are not only perfect for holding candy, it also meant I didn’t have to mess around with paper mache. Double win!

Materials
- Paper lantern from The Reject Shop
- Crepe paper in white and black from The Reject Shop
- Double-sided tape
- Regular sticky tape
- White paper/card
- Scissors (regular, plus fringing scissors if you have them)
- Candy from The Reject Shop
Step 1
Assemble your paper lantern according to the instructions on the packet.

Step 2
Cover up the hole at the bottom of the lantern with a sheet of card taped in place.
Don’t worry about making this part look perfect – you just want to make sure that it seals off the bottom so that the candy doesn’t fall out. The fringing will eventually hide the card from view so for now you can tape it up as messily as you please. 🙂

Step 3
Cut a crepe paper ‘skirt’ for your piñata that’s just a little shorter than the height of your lantern. Make sure it’s wide enough to wrap all the way around your lantern with a bit of overlap.

Step 4
Set aside your crepe paper skirt and start cutting the rest of your crepe paper into strips (I made my strips around 2.5cm/1 inch in width). Make sure each strip is long enough to wrap all the way around your lantern.
Handy tip – you can skip this step entirely if you opt to use white streamers instead of crepe paper.

Step 5
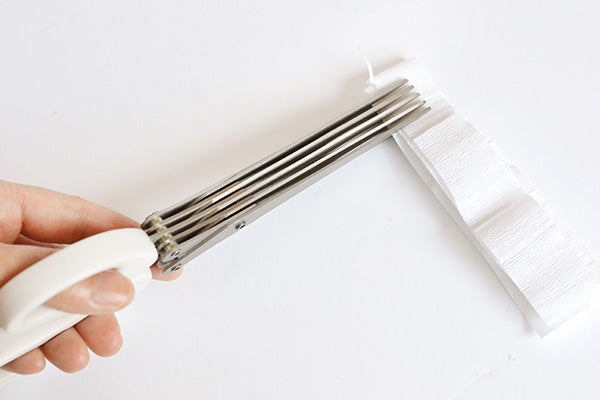
Once you’ve cut all your strips, start trimming them to create a fringe. To do this, simply snip partway into your strips at regular intervals, stopping before you cut all the way through. The end result will be a nicely fringed piece of crepe paper.
Another handy tip – This step will be much quicker if you double or triple fold your crepe paper strip so you’re cutting through several layers at once. And it’ll go that much faster still if you’re using fringing scissors. 😉

Step 6
Once you’ve fringed your streamers, set them aside for a moment and return to the crepe paper skirt you created in Step 3. Fringe the bottom of the skirt.

Step 7
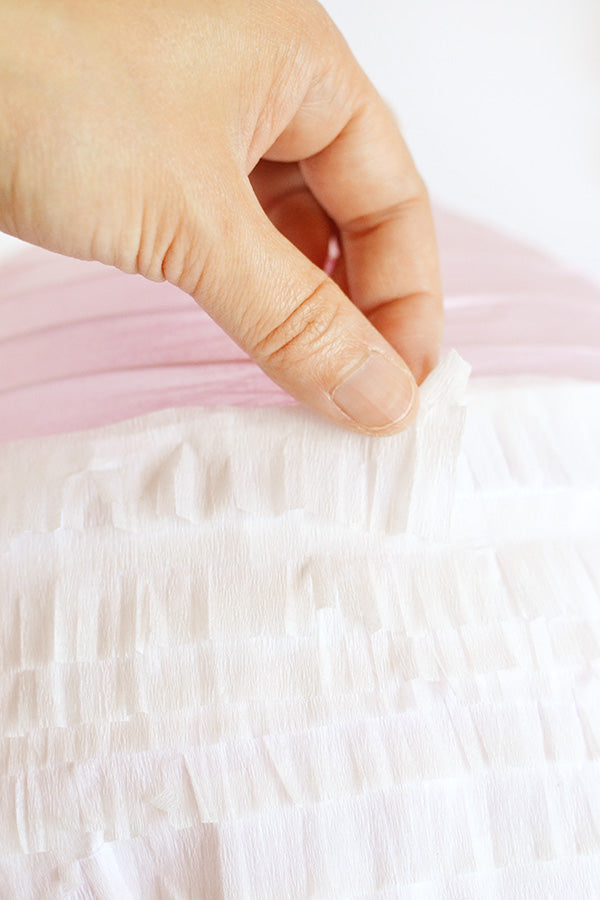
Apply pieces of double-sided tape to the backs of your fringed crepe paper strips and start sticking them to the crepe paper skirt, starting from the bottom and working your way upwards until the whole skirt is covered. Make sure you overlap them as you go.


Step 8
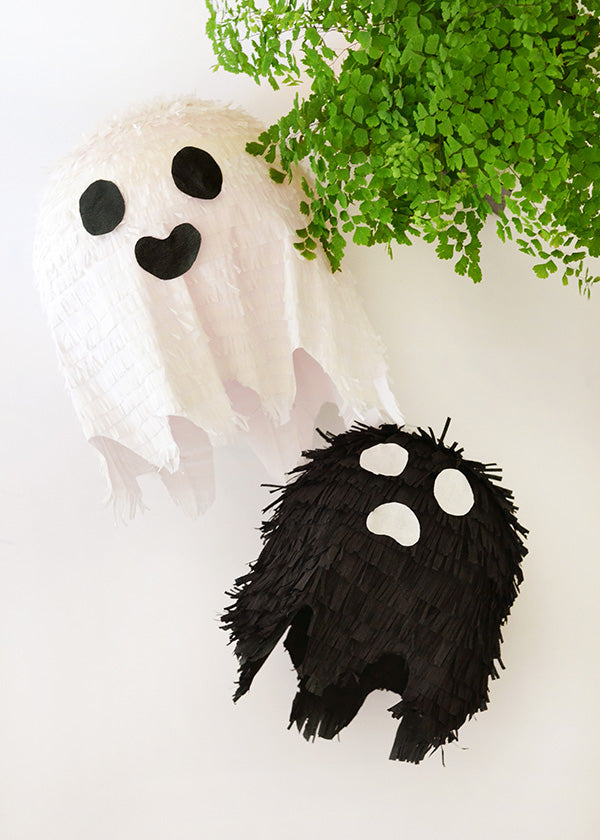
Cut waves into the bottom of the crepe paper skirt – this will be the wavy part at the bottom of your ghost.

Step 9
When the waves have all been cut, flip the skirt over so that it’s face down and apply some double-sided tape to the back, along the top edge. Then stick it to the lantern, wrapping it all the way around the middle.


Step 10
Start covering the rest of your lantern with fringed crepe paper strips, starting from where you attached the skirt and working your way up to the top. Make sure you overlap each layer of fringe over the previous one so no part of the lantern peeks out and all you can see is fringe.

Step 11
Once you’ve reached the top and your lantern is fully covered in fringed strips, fill the lantern with candy.

Step 12
When your pinata has been filled with sweet treats, cut two semi-circle pieces of white card to cover up the hole in the top of the piñata. Stick them down with sticky tape before covering them with more fringed crepe paper. Make sure you leave the hook peeking out so you can still hang up your lantern!


Step 13
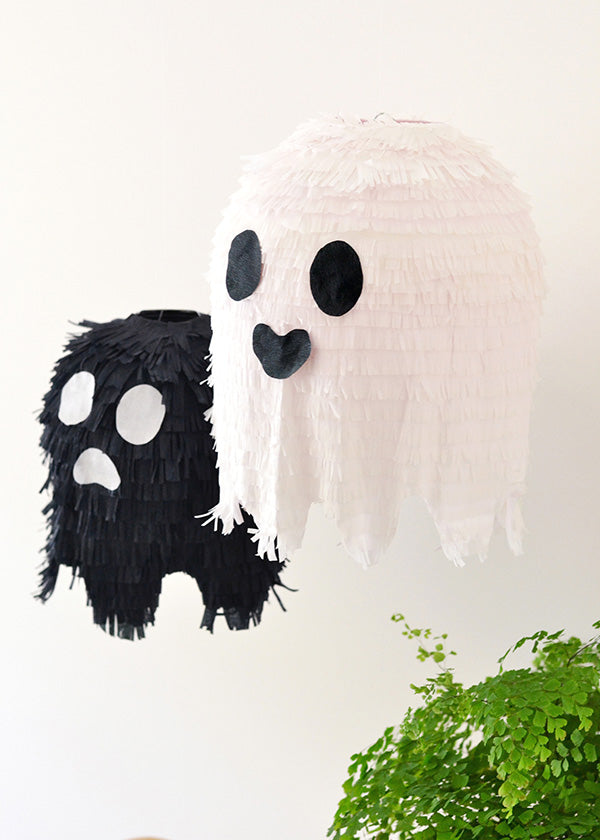
Cut two ovals and a jelly bean shape from some black crepe paper. These will be the eyes and mouth of the ghost.

Step 14
Stick the eyes and mouth on the ghost with some double-sided tape and your little Halloween friend is complete!


I’d planned to give these to my nieces to pull apart on Halloween, but they’re looking so sweet and innocent all propped up in my studio that I might not be able to part with them! What do you think – could they legitimately pass as decorations for all-year-round use? 😉
xx Steph
A little note: This post was created in partnership with The Reject Shop. All opinions, the project and my newfound love for piñatas are my own. Thanks for supporting the organisations that support Make and Tell.