

Tell me, does a face qualify as a ‘body part’? Because if it does, I think that would explain why I’ve been so nuts about them lately; I’m still well and truly hooked on anatomy it seems! (see here, here, here and here for my other ‘body part’ projects).
I haven’t yet asked Fred (my husband) how he feels about the influx of eyes and limbs in our home decorating, but I for one am a-okay with it; especially if it means I can have these little cuties watching over me as I type at my keyboard. Fred refuses to let us get a cat, so really this is the next best thing don’t you think?

And the best part is that these fellas are hella useful (yep, that’s right I’m over thirty and I used the word ‘hella’; I’m all kinds of cool). I’ve made some for my desk, some to store trinkets and still more to hold my air plants. They’re addictive I tell you!

Materials
- Wood pieces (I used pine)
- Ruler
- Pencil
- Hand saw
- Mitre box
- Wood glue
- Paintbrush
- Primer
- White acrylic paint
- Coloured acrylic paint
- Black paint pen
Step 1
Measure out your wood pieces with a ruler and pencil.

To make each box you’ll need 3 square pieces, 2 rectangular pieces and 1 triangle piece. One of the square pieces will be the base of your box, the other two will be the front and the back. The rectangular pieces will be the two sides. And last but not least, the triangle piece will be the nose.
- The 3 square pieces: First decide how tall and wide you want the finished box to be, then use this as a basis for sizing up your square pieces. I wanted my boxes to be fairly small, so I made each of my square pieces 6.5cm tall by 6.5cm wide (2.56 x 2.56 inches).
-
The 2 rectangular pieces: These will measure the same height as your square pieces, but you will need to calculate the width based on the thickness of your timber. Basically the width of your rectangles will be the width of your square piece minus 2 x the thickness of your timber.
- As an example, the thickness of my timber was 0.8cm and the width of one of my square pieces was 6.5cm. So I made the width of my two rectangular pieces 6.5 – (0.8 x 2) = 4.9cm.
- The triangle piece: This can be pretty much any size you like, but obviously don’t make it any taller than the height of your box. I measured out my triangles so that they were slightly shorter than my boxes.
If all of this is too complicated, just see below to use my exact measurements!
- Timber thickness: 0.8cm (0.315 inches)
- 3 squares: 6.5cm tall x 6.5cm wide (2.56 x 2.56 inches)
- 2 rectangles: 6.5cm tall x 4.9cm wide (2.56 x 1.93 inches)
- 1 triangle: 6cm tall x 4.5cm wide (2.36 x 1.77 inches)
Step 2
Cut out each of the pieces you measured in Step 1 with a hand saw. For the triangular piece, use a mitre box to saw a square piece of wood in half diagonally (this will result in two triangles, which is perfect if you’re making two boxes!).

Step 3
Once all your pieces have been cut, give them a quick sand to remove any rough edges.

Step 4
Get two of your square pieces and stick them together with wood glue so that they’re perpendicular to each other.


Select one of your rectangular pieces, add some glue to the edges, and stick it to your two square pieces so that all three bits of wood form a corner.

Get your second rectangular piece and stick it to the other side of your box as shown below.

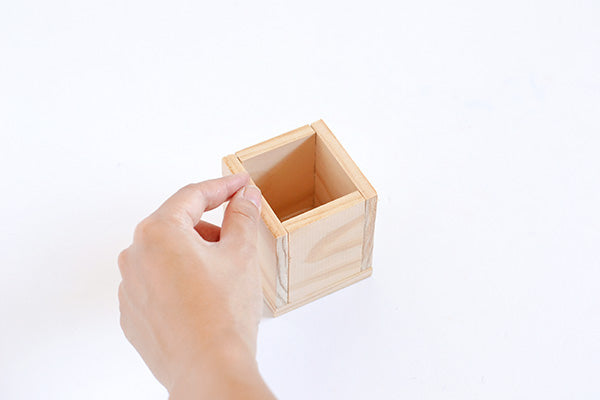
Finally, glue the remaining square piece to the two rectangular pieces so that it forms an open-top box.
Step 5
Add some glue to the triangular piece and stick it to the front of your box.


Step 6
Give each of your boxes a good coat of primer, then paint them white.


Step 7
After painting everything white, I changed my mind and decided that I wanted my boxes to have a bit of colour so I painted the insides with bright pink and yellow paint. This step is completely optional – you can leave the insides white if you prefer.

Step 8
With a paint pen, start drawing faces on the front of your box. I decided to keep things as simple as possible and used lines and dots for the eyes, with a couple of painted-on circles for the cheeks.

Once the faces are done, add in some hair. For one box, I drew an outline first and filled it in with black paint; on the second box, the hair consisted of wavy lines extending all the way around the sides.
Don’t be afraid to have fun and experiment – this is where you can get creative and explore different styles to make these face boxes truly unique!

Oh and if you’re not comfortable with the permanency of a paint pen, draw your design in pencil first. If you keep it nice and light, you should be able to rub out any mistakes with an eraser, and then once you’re happy with how it looks you can go over the final design with paint pen.

Once you’ve drawn and painted in your faces, simply leave the boxes to dry and then they’re ready for use as storage!


I love how these guys add a little playfulness to my otherwise mostly serious interior decor. I’m thinking about adding faces to lots more items around the home… tell me, how many more do you think I need to make before Fred caves in and says we can get a cat? 😉
xx Steph